I started to redecorate my kitchen today - redecorate, not renovate. I'm dreaming of oceans of granite, traditional white cabinetry, warm wooden floors, recessed pot lights, silvery glowing crystal pendants, an island so big I could happily castaway on it and last but not least, a butlers pantry for the mess and clutter.....What I have is a teeny tiny 8 foot by 12 foot kitchen. No counter space, laughable storage, chipped laminate counter top, a vinyl floor that has seen better days and a very amateur drywalling job (done by the original owners). I, myself have very minimal reno skills - carpentry, plumbing and electrical are beyond me but I can put a gallon of paint to good use.
When I moved in, the flawed walls were covered with a wallpaper that was probably popular in the 70's. It was a white background with stripes of navy blue that had garlands of tiny navy and pink flowers alternating with the stripes. So not my taste but it was presentable and I lived with it for a few years. Finally the wood-tone 70's cabinets with the fake gold filigree handles smack in the middle of each door sent me over the edge. I started stripping wallpaper and saw how bad the walls were. They really needed to be taken back to the studs and professionally redone. However that was beyond my budget as was a professional skim job so I did the best I could. I painted the entire kitchen white. Partially this was a reaction to the fussy wallpaper. I just craved clean and bright and white. Pragmatically though, it was also a need to be able to paint the ceiling, crown moulding and walls over the basement staircase with a roller on an extension pole instead of paying for scaffolding. I replaced the cheap fluorescent light with a white fan and had a new tap installed. The cupboards got a paint job and new knobs. The bottom cupboards were painted blue because I was limited by the counter top. However after I started, I realized that Home Depot did not mix the colour I actually requested. I painted the upper cabinets a cream colour as I thought there was too much white in the room and it needed some warmth. I also added one of those flat pack white pantry cupboards to help with the storage issues.
I lived with this room for the last couple of years but I admit that I was never happy with it. The upper cupboards just looked dingy, not warm. There was way too much white in the room which made everything else looking dirty and tired. When my white stove died and I replaced it with a stainless steel one, it just looked worse and made me start thinking about changing things again. The last straw was a hinge breaking on the pantry cupboard with no possibility of replacing it. As per usual, Sarah Richardson is my inspiration and I started looking at some of her past designs. I then discovered that I could buy her paint locally and decided now was the time to begin. I painted the walls today. See the before pictures below.

The view from the living room doorway into the kitchen. Kitchen mess all over the dining room table beyond...

View from living room doorway looking down the basement stairs...

Piecrust valance - there used to be a wall along the basement stairs before an addition was added. The original owners may have thought this was stylish way to hide the beam but I try not to look up! Unfortunately with the cost of removing it, we'll live with it...

A view of the side door from the middle of the kitchen. Before the addition, this door used to be at the top of the stairs and you can see where I have repaired the crack in the wall (for about the third time). Stay tuned to see how I am going to address this defect.

The base cabinets painted blue...

The upper cabinets viewed from the dining room doorway....and here's a sneak peek of the SR paint on the walls...


When I moved in, the flawed walls were covered with a wallpaper that was probably popular in the 70's. It was a white background with stripes of navy blue that had garlands of tiny navy and pink flowers alternating with the stripes. So not my taste but it was presentable and I lived with it for a few years. Finally the wood-tone 70's cabinets with the fake gold filigree handles smack in the middle of each door sent me over the edge. I started stripping wallpaper and saw how bad the walls were. They really needed to be taken back to the studs and professionally redone. However that was beyond my budget as was a professional skim job so I did the best I could. I painted the entire kitchen white. Partially this was a reaction to the fussy wallpaper. I just craved clean and bright and white. Pragmatically though, it was also a need to be able to paint the ceiling, crown moulding and walls over the basement staircase with a roller on an extension pole instead of paying for scaffolding. I replaced the cheap fluorescent light with a white fan and had a new tap installed. The cupboards got a paint job and new knobs. The bottom cupboards were painted blue because I was limited by the counter top. However after I started, I realized that Home Depot did not mix the colour I actually requested. I painted the upper cabinets a cream colour as I thought there was too much white in the room and it needed some warmth. I also added one of those flat pack white pantry cupboards to help with the storage issues.
I lived with this room for the last couple of years but I admit that I was never happy with it. The upper cupboards just looked dingy, not warm. There was way too much white in the room which made everything else looking dirty and tired. When my white stove died and I replaced it with a stainless steel one, it just looked worse and made me start thinking about changing things again. The last straw was a hinge breaking on the pantry cupboard with no possibility of replacing it. As per usual, Sarah Richardson is my inspiration and I started looking at some of her past designs. I then discovered that I could buy her paint locally and decided now was the time to begin. I painted the walls today. See the before pictures below.
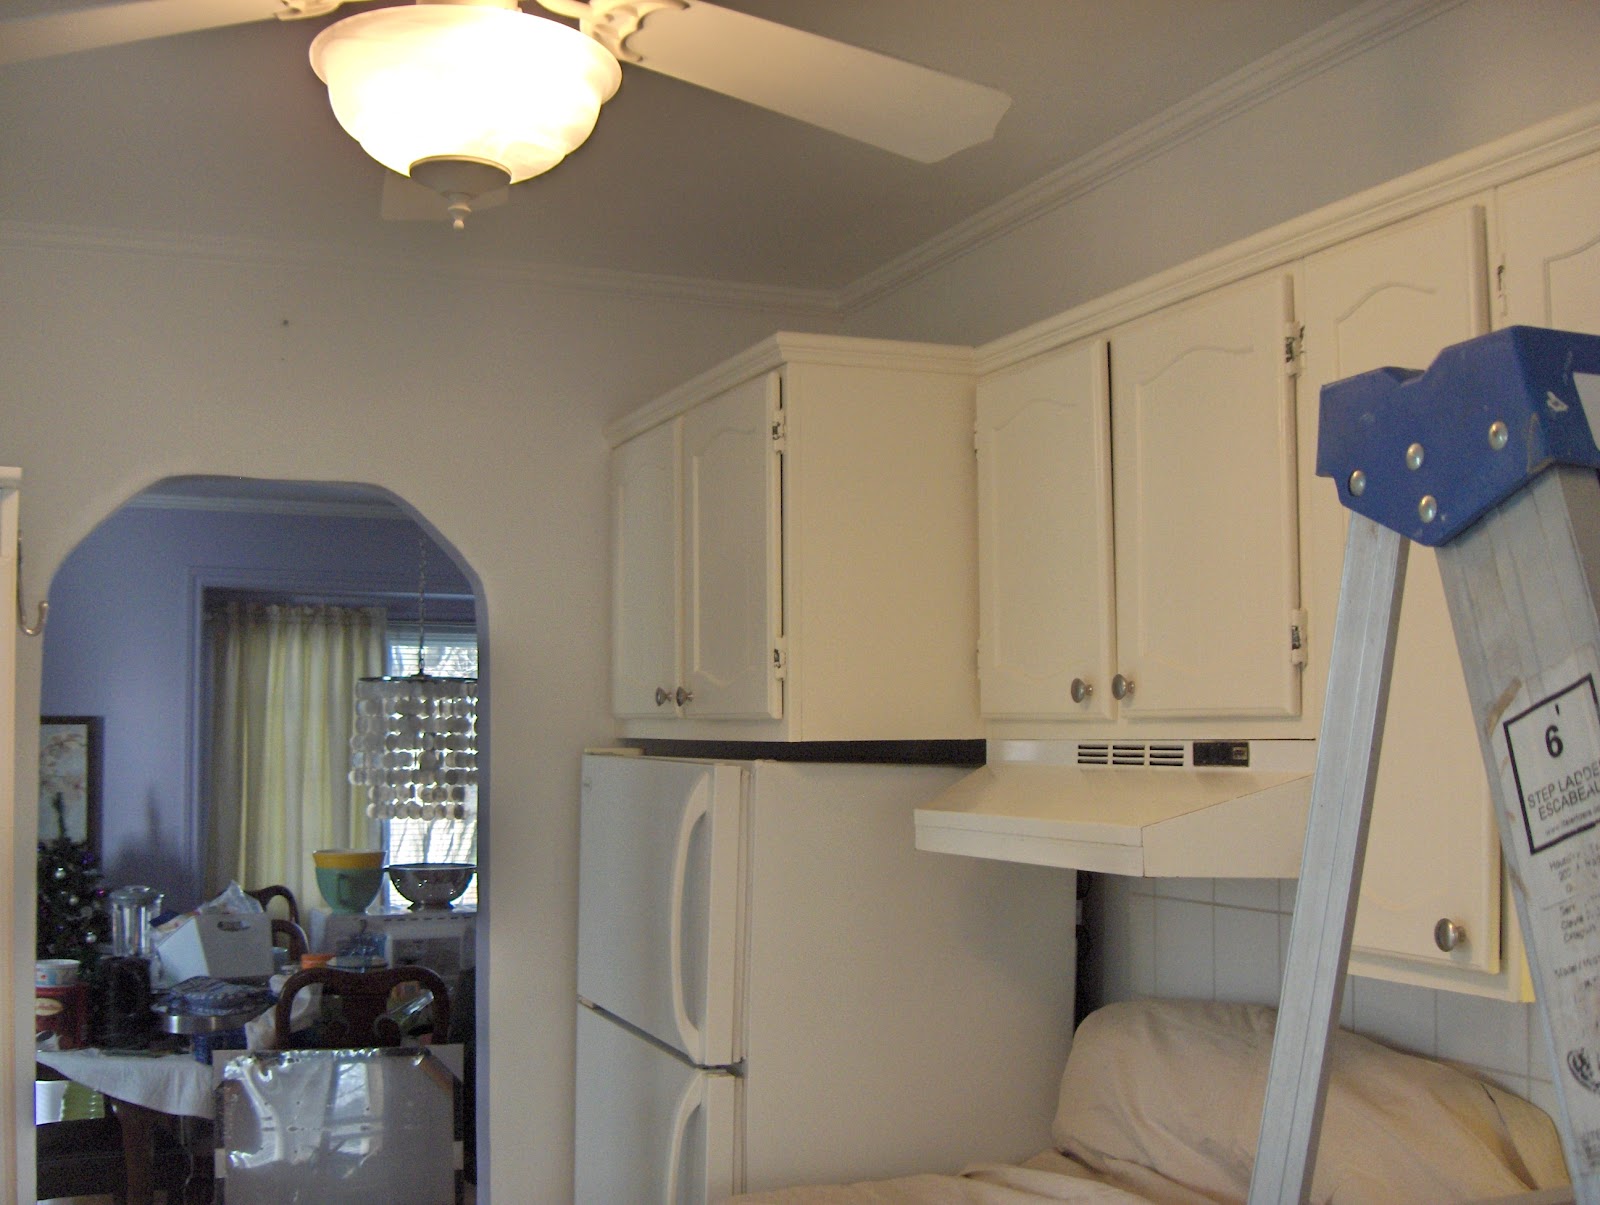
The view from the living room doorway into the kitchen. Kitchen mess all over the dining room table beyond...

View from living room doorway looking down the basement stairs...

Piecrust valance - there used to be a wall along the basement stairs before an addition was added. The original owners may have thought this was stylish way to hide the beam but I try not to look up! Unfortunately with the cost of removing it, we'll live with it...

A view of the side door from the middle of the kitchen. Before the addition, this door used to be at the top of the stairs and you can see where I have repaired the crack in the wall (for about the third time). Stay tuned to see how I am going to address this defect.

The base cabinets painted blue...

The upper cabinets viewed from the dining room doorway....and here's a sneak peek of the SR paint on the walls...